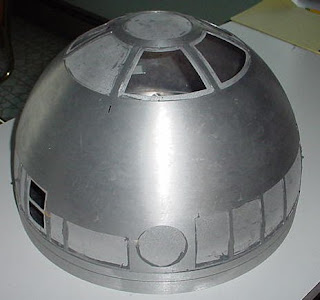
Lots of painting and cleaning to get the dome to this point. I glued on the panels with JB Weld and several are hinged. I also glued a hinge on the panel that will eventually be the periscope just so I would not lose or damage the panel. Now time to work on some lighting.
My Mom always told me I should "make new friends" so at an early age I took her literally and started playing with robots. I never stopped even when I grew up so here goes my efforts at making some new droid companions.
Friday, July 30, 2010
Droid Stand
Not all of the work is on the R2 itself. Today I needed a stand so I could work one the center leg plus get the bot up off the ground. Started with some plastic plumbing pipe and fittings.
Finished stand with frame resting on top. This should give me great access to work on the legs off the ground.
Tuesday, July 27, 2010
Dome Drive
Installed a Pittman gear reduced motor for the dome drive. This uses a wheel with a large o-ring to drive the bearing. A spring holds tension on the wheel to keep it from slipping. Works great - first moving part and it's fun to see.
Dome Drive System
Checking the amp draw of the dome drive motor (.6 amp) with everything installed. The motor runs at .2 amp no-load. I am using a temporary speed control I had laying around for testing and will be using a different unit when everything is firmed up later.
Tuesday, July 20, 2010
Dome Ring and Bearing
 Fitted the rockler bearing to the frame and dome ring. First I popped out all the plastic bushings from the bearing and drilled out all the holes. Next I added 2" long 10-24 flat head SS bolts from underneath the center bearing and fitted with a washer and locknut. Then I used a short piece of super blue vinyl tubing and another locknut that the dome ring will rest on. This top nut can be ajusted up or down to make the bottom spacing of the dome ring perfect. The only reason for the tubing is "robot bling".
Frame
 Put together my Com-8A frame. This went together easily and looks fantastic. Will almost be a shame to put skins on it (almost :-)). Really needed to get the frame together so I can work on fitting the dome ring.
Sunday, July 18, 2010
More Dome
All glued and ready for final cleanup of the excess JB Weld. Everyting lined up nicely and the complete unit is very solid.
Friday, July 16, 2010
More Dome Gluing....
Will this never end? - it seems our lot in life. You go that way......
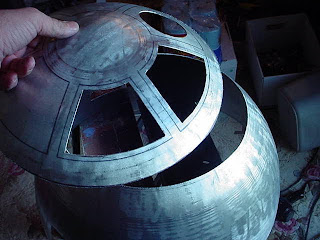
Glued in the bottom half of the inner dome and matched up to the upper half with refrence marks I drew. After this picture I cleaned up a lot of the JB Weld while it was wet.
Glued in the bottom half of the inner dome and matched up to the upper half with refrence marks I drew. After this picture I cleaned up a lot of the JB Weld while it was wet.
Wednesday, July 14, 2010
Dome Gluing
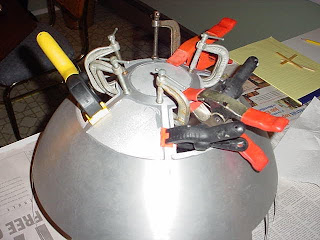
Time to glue the top inner dome esction to the outer dome. Lots of JB Weld and every clamp I could find get the job done. Found it was very important to mark the parts orientation well so everything fit properly.
Tuesday, July 13, 2010
R2-D2 Begins
 R2-D2 Begins. Starting with an R&J dome I marked some of the panels I wanted to open on the inner dome. These were cut out using a dremel tool.
Subscribe to:
Comments (Atom)


